Tiles on floors and walls give a clean, polished look to homes, kitchens, bathrooms, and balconies. Over time, the grout between tiles can become dirty, stained, crumbly, or discolored. Many people think the only solution is to remove all that old grout and start again. But often you can restore and renew the grout without full removal. In this guide, you will learn when and how to regrout over existing grout correctly. The writing is simple, sentences are short, and the methods are easy to follow. This is ideal for homeowners, masons, and DIY lovers in India who want effective results with less work and less mess.
When Is It Safe to Regrout Over Existing Grout?
Before doing any regrouting, first check whether the existing grout is still firm and sound. You can test by gently pressing it with a thumbnail or a small screwdriver tip. If the edges crumble, crumble when touched, or dust off easily, then that grout is already failing. It will not hold the fresh grout, and you must remove it before applying new grout. On the other hand, if the grout feels hard, intact, and bonded to the tile and substrate, with no deep cracks or missing pieces, then an overlay can work well. Old grout that is simply stained or superficially worn can often be reworked successfully. The key is that the old grout must still serve as a stable base. Overlaying on weak or loose grout will lead to peeling or cracking soon after drying.
What Makes Grout Fail in Indian Tile Installations?

Several factors contribute to grout deterioration in Indian homes. The humid climate, frequent water splashes in bathrooms and kitchens, and repeated wet–dry cycles accelerate wear. If the original grout was applied poorly — with too much water, improper curing, or without sealing — it will absorb moisture and become soft. Soil, soap, mildew, and mold may settle into damp grout, staining it deeply and weakening it. Frequent scrubbing with harsh chemical cleaners also wears down the grout surface. In older buildings, shifts or minor structural movements can crack grout joints. Given these realities, many grout problems are superficial damage rather than complete failure. This condition is ideal for regrouting over existing joints, provided proper cleaning and preparation are done before overlaying.
How to Regrout Over Old Grout: Step-by-Step Method for Indian Homes
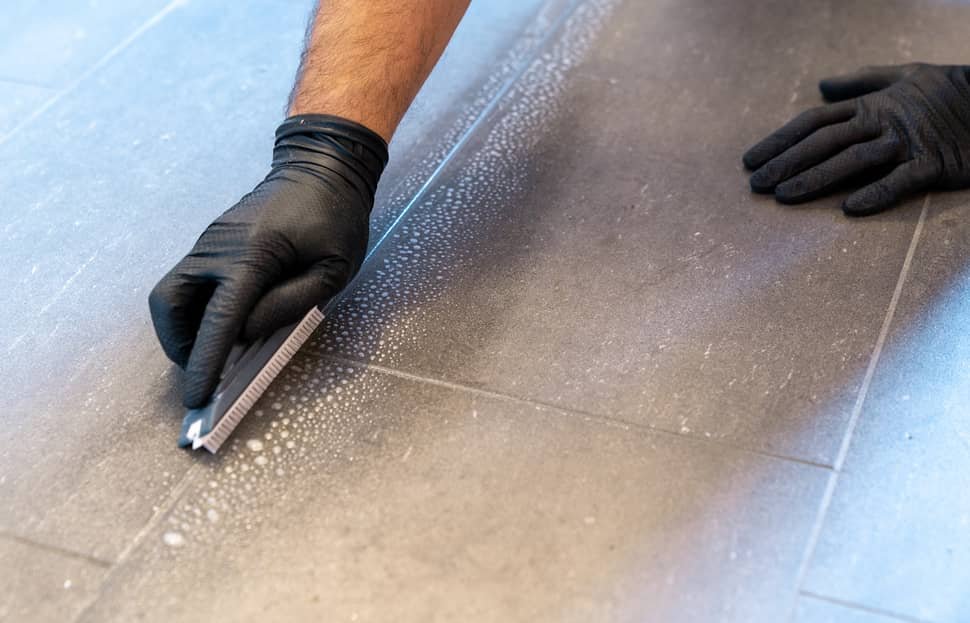
First, remove dust, dirt, grease, soap scum and mildew from the grout lines. Use a gentle tile-safe cleaner or mild detergent and scrub the joints with a stiff nylon brush or an old toothbrush. Rinse thoroughly with clean water and let the tiles dry completely. In humid conditions or during monsoon seasons, ventilate the room or use a fan or dehumidifier. It may take 24 to 48 hours for grout to dry fully; this drying step is critical. Any trapped moisture will prevent the new grout from bonding properly.
Once the grout lines are dry, light abrasion improves the bond between old and new grout. Use fine sandpaper or a fine sanding block to gently roughen the surface of the old grout. Take care not to scratch or chip the tile edges. The goal is just to open up micro-pores and remove any old sealant layer. If the old grout is glazed, sealed or particularly smooth, this abrasion step becomes even more important. After sanding, wipe joints thoroughly with a damp cloth, then wipe again with clean water, and finally wipe with a cloth dampened in isopropyl alcohol or water to remove all dust and residues. Let dry for at least a few hours.
If recommended by the manufacturer of your new grout, apply a thin layer of grout primer or bonding additive into the joints. This will help the new grout adhere better to the old surface and counteract any lingering glaze or residue. Especially when using cement-based grouts over old grout or even on smooth tiles, a primer ensures stronger adhesion. Allow the primer to become tacky as per instructions before applying grout.
Next, prepare the new grout mixture carefully. Use the correct water-to-powder ratio specified on the pack. The right consistency is key: too thin and the grout will shrink or leak; too dry and it will not fill joints properly. For small bathrooms or walls, hand-mixing in a clean bucket works well. For larger areas, a mechanical mixer gives more consistent results. If you are covering existing grout with new grout (overlay), aim for a slightly stiffer mix than you would for normal grouting so that it stays in place and does not slump out of the joints.
Apply the new grout using a rubber float or squeegee held at about 45 degrees. Force the grout into each joint so it fills completely, compacting well. After filling, wipe off excess grout from tiles quickly with a moist sponge held at a shallow angle so as not to pull grout out of the joints. Let the grout firm up slightly, then do a second wipe with a clean damp cloth or sponge to remove grout haze from tile faces. For epoxy grouts — often preferred for wet areas like bathrooms or kitchens — follow manufacturer instructions carefully, as epoxy sets quickly and requires precise timing and clean tools.
Allow the new grout to cure fully. For cementitious grouts, this usually means keeping the area dry for at least 24 to 48 hours. During monsoon or high humidity seasons common in many parts of India, ensure good ventilation or use a dehumidifier. Once cured, apply a grout sealer or impregnator (if the grout type and tile finish allow). This helps protect the new grout from stains, mould, and moisture ingress, extending its life significantly.
When Partial Removal Is Better Than Just Overlay
Sometimes overlaying new grout on top of old is not enough. If the existing grout shows signs of deeper damage — for example, if the outer layer is powdery or flaking but the inner core still grips — then partial removal is the best option. Use a narrow grout saw or an oscillating multi-tool with a fine blade to carefully remove the outer 1–3 millimetre layer of old grout. This creates a fresh “key” for new grout while avoiding tile damage. After removal, clean thoroughly, prime if required, mix and apply new grout as above. This hybrid method — partial removal followed by regrouting — often provides the best long-term bond and durability.
Also Read How to Remove Iron from Pool Water for Clean and Clear Swimming Pools
Why Epoxy Grout May Be a Smart Choice for Indian Bathrooms and Kitchens
For showers, bathrooms, and kitchens where water exposure is frequent, epoxy grout often outperforms plain cement based grout. Epoxy grout is water-resistant, stain-resistant, mould-resistant and durable under constant wet-dry use. It bonds strongly to tile surfaces and resists cracking from minor movement. When you overlay existing grout in a shower or near a sink, epoxy offers better performance — assuming you prepare the surface well, ensure perfect cleanliness, follow precise mixing ratios, and apply within controlled temperature and ventilation conditions. Epoxy is more expensive and a bit harder to work with, but it pays off in long term durability.
Common Mistakes to Avoid and How to Prevent Them
One common mistake is skipping the cleaning step. If residual soap scum, grease or sealant remains, the new grout will not bond properly. Always clean thoroughly, rinse well and let dry. Another mistake is over-watering the mix to make it easier to spread. This weakens the grout and can cause shrinkage, cracking or wash-out. Strictly follow mix instructions. Sometimes people regrout directly over grout that shows signs of decay — this always fails. Always test old grout first. Using acid cleaners or bleach on old grout before overlay may leave residues that inhibit bonding. Use mild cleaners, rinse and dry well. Finally, in humid and hot Indian climates, failing to allow proper curing time or skipping sealer application reduces longevity. Plan your work when humidity and temperature are manageable, or provide artificial ventilation and controlled drying.
How Often Should You Renew Grout in Indian Homes?
There is no single rule. But a good approach is to inspect tile joints at least once a year — especially in high-use areas like bathrooms and kitchens. Look for cracks, discoloration, soft spots, mould or water seepage. If grout is only stained or surface-worn, an overlay regrout is sufficient and cost-effective. If grout is crumbling or missing, better to rake and regrout fully. In wet zones, reseal cement grouts every 6 to 12 months. Epoxy grout may last longer before resealing. Regular checking helps prevent seepage, tile lifting, and avoids big restoration jobs later.
Safety, Tools, and Accessories Checklist for Indian DIY or Site Work
Use a good quality stiff nylon grout brush, a sponge, a grout float or rubber squeegee, a small sanding block or fine sandpaper, and a bucket for mixing. Always wear a mask when sanding to avoid silica dust. Gloves and safety glasses help when mixing grout powders or epoxy compounds. For enclosed spaces, ensure ventilation after cleaning with chemicals. Use dehumidifiers or low-speed fans in humid weather to speed up drying. Keep tools clean between uses, especially when using epoxy grout — cured epoxy is hard to remove.
Frequently Asked Questions (FAQ)
Is it really possible to regrout without removing old grout?
Yes – if the old grout is sound, intact and strongly bonded. Cleaning and light abrasion create a fresh base for overlay.
Will the new grout crack or peel if I don’t remove old grout?
Not if you prepare correctly. Clean thoroughly, dry completely, abrade lightly or prime, and use the right grout type and mix. Skipping these steps causes failure.
Can I change grout color when regrouting over old grout?
Yes. Overlay regrout allows you to refresh tile joints with a new color. Use a grout kit labeled for grout-over-grout or follow manufacturer recommendations.
Which is better for Indian bathrooms — cement grout or epoxy grout?
Epoxy grout is better for wet, high-use areas because it resists stains, mold, chemicals and frequent wetting. Cement grout is fine in dry areas or where water exposure is low.
Do I need to seal new grout after regrouting?
Yes for cementitious grout. Sealing prevents moisture absorption and staining, especially in kitchens and bathrooms. Epoxy grout typically does not need sealing.
Final Thoughts
Regrouting tiles without removing old grout is a smart, practical solution when the existing grout is still sound. It saves time, lowers cost, reduces mess, and extends the life of tile installations. However, success depends on correct preparation: thorough cleaning, complete drying, light abrasion or priming, correct grout choice, and proper curing. For wet and humid environments—common in Indian homes—epoxy grout and timely sealing give the best long-term outcome. Intermediate level homeowners, masons or site teams can follow this guide to revive tile joints, refresh the look of bathrooms or kitchens, and avoid full tile removal.