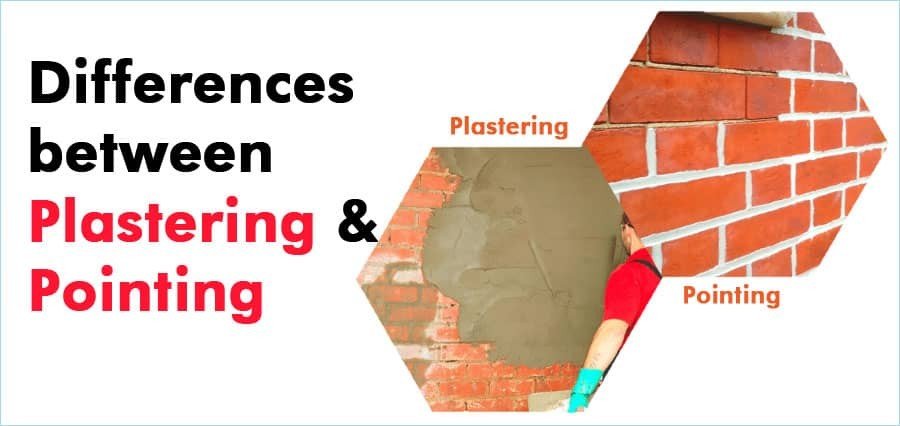
When you look at a finished wall, it appears smooth, even, and neat. But have you ever wondered how rough brickwork turns into that perfect finish? The answer lies in plastering and pointing — two essential techniques used in building construction to protect and beautify walls.
Both plastering and pointing improve the durability, appearance, and strength of structures. However, they serve different purposes and are applied in different ways.
In this detailed guide, we will explore everything about plastering vs pointing, including their definitions, purposes, types, materials, methods of application, advantages, and key differences.
This article is written in simple English for civil engineering students, contractors, and construction professionals in India.
What is Plastering?
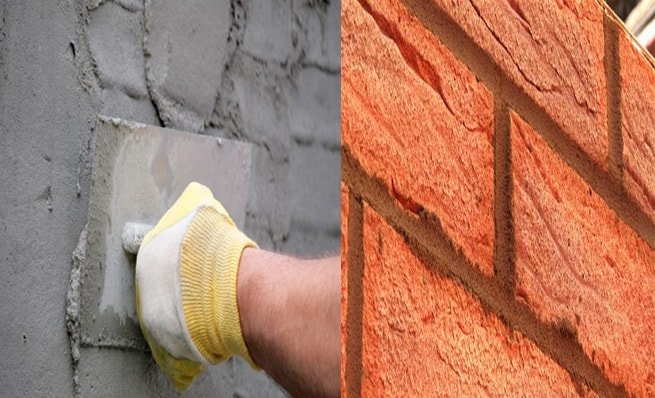
Plastering is the process of covering rough surfaces of walls, ceilings, or other building parts with a smooth layer of plastic material, usually made of cement mortar.
The main goal of plastering is to create an even and smooth surface suitable for painting or decoration.
Purpose of Plastering
- To protect surfaces from rainwater, heat, and moisture
- To cover irregularities in brick or stone masonry
- To create a decorative and clean finish
- To provide a base for paint or wallpaper
- To improve the durability of the wall surface
What is Pointing?
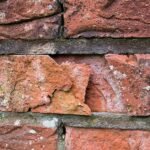
Pointing is the process of applying mortar to the exposed joints of brick or stone masonry.
It involves filling and finishing the outer part of mortar joints to make them watertight and improve appearance.
Unlike plastering, which covers the entire wall, pointing is applied only on the joints between bricks or stones.
Purpose of Pointing
- To prevent water penetration through joints
- To increase the life of masonry walls
- To enhance the appearance of exposed brick or stonework
- To repair or renew cracked or weathered joints
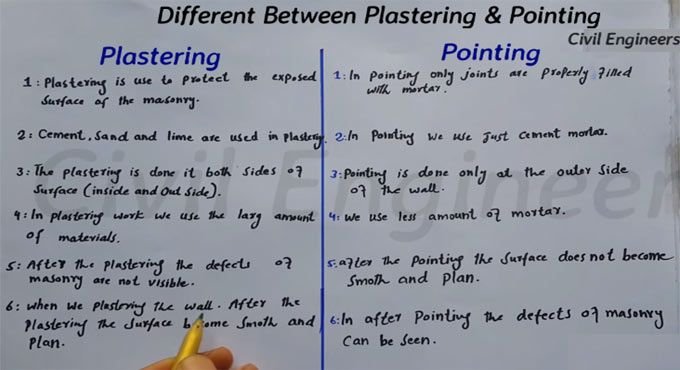
Key Differences Between Plastering and Pointing
The table below summarizes the main differences between plastering and pointing based on purpose, material, and application.
| Aspect | Plastering | Pointing |
|---|---|---|
| Definition | Covering the entire surface of a wall or ceiling with mortar | Filling and finishing the exposed joints of masonry work |
| Purpose | To make the surface smooth, durable, and ready for painting | To protect joints and improve appearance of masonry |
| Applied On | Entire wall surface | Joints only |
| Thickness | 12 mm to 20 mm | 6 mm to 12 mm |
| Material Used | Cement mortar, lime mortar, gypsum plaster | Cement mortar or lime mortar |
| Surface Appearance | Smooth and plain | Joint pattern visible |
| Durability | High protection and strength | Moderate protection (only joints) |
| Aesthetic Role | Decorative smooth finish | Highlights joint patterns |
| Cost | Higher | Lower |
| Maintenance | Needs repainting or polishing | Needs repointing after a few years |
Materials Used in Plastering and Pointing
Both processes use similar materials, but the mix proportions and application techniques differ.
Materials for Plastering
- Cement – Provides strength and binding property
- Sand – Adds bulk and prevents shrinkage
- Water – Required for hydration and workability
- Lime – Improves smoothness and plasticity (optional)
- Gypsum – Used in modern interiors for fine finish
Materials for Pointing
- Cement Mortar (1:3) – Commonly used in modern masonry
- Lime Mortar (1:2 or 1:3) – Used in old and heritage buildings
- Pigments or color additives – To match or enhance the wall color
Types of Plastering
Plastering can be classified based on the type of material used and the surface finish required.
1. Cement Plaster
- Mixture of cement and sand (1:4 to 1:6)
- Most common type in modern construction
- Durable, weather-resistant, and ideal for both interior and exterior walls
2. Lime Plaster
- Made from lime and sand
- Produces a smooth, breathable surface
- Common in traditional and heritage structures
3. Mud Plaster
- Made with mud, straw, and cow dung
- Eco-friendly and affordable
- Common in rural housing and low-cost buildings
4. Gypsum Plaster
- Made from gypsum powder and water
- Used mainly for interior walls and ceilings
- Provides a smooth white finish and quick setting
Also Read What is SPT — Standard Penetration Test in Construction (Complete Guide for India)
Types of Pointing
Pointing is classified based on the shape and finish of the joints.
1. Flush Pointing
- Mortar is pressed flush with the wall surface
- Strong and durable, but less decorative
2. Recessed Pointing
- Mortar is pressed slightly inward (3–5 mm) from the face
- Creates a shadow effect and looks neat
3. V-Groove Pointing
- A V-shaped groove is made at the center of the joint
- Attractive and often used in decorative masonry
4. Weathered Pointing
- The outer edge of the joint slopes outward
- Helps drain rainwater and prevents seepage
5. Struck Pointing
- The upper edge of the joint is pressed in while the lower edge projects out
- Gives a sharp appearance and better water resistance
Method of Plastering
The plastering process involves several steps to ensure a uniform and durable finish.
Step 1: Surface Preparation
- Clean the wall and remove dust, oil, or loose mortar
- Dampen the surface before applying plaster
Step 2: Application of Base Coat
- Apply the first layer (about 12 mm thick)
- Roughen the surface for a better bond with the next coat
Step 3: Application of Finishing Coat
- Apply the second layer (3–8 mm thick)
- Level the surface and smooth it with a trowel
Step 4: Curing
- Keep the plaster moist for at least 7 days to gain strength and avoid cracks
Method of Pointing
Step 1: Raking of Joints
- Remove old mortar to a depth of about 15–20 mm
- Clean the joints properly using a wire brush
Step 2: Wetting the Surface
- Dampen the joints before applying mortar
Step 3: Filling the Joints
- Fill mortar in the raked joints using a pointing tool
Step 4: Finishing
- Shape the joints according to the desired pointing style
Step 5: Curing
- Keep the surface moist for 2–3 days to strengthen the joints
Importance of Plastering and Pointing in Building Construction
| Aspect | Plastering | Pointing |
|---|---|---|
| Weather Protection | High – seals the entire surface | Moderate – protects only joints |
| Structural Strength | Increases surface durability | Strengthens joint area |
| Aesthetic Value | Smooth and modern appearance | Traditional and rustic look |
| Maintenance | Needs repainting | Requires repointing periodically |
| Application Area | Interior and exterior | Exterior, especially masonry walls |
Use of Plastering and Pointing in Indian Construction
In India, both techniques are widely used depending on the building type and purpose.
- Urban Buildings: Cement plaster is the most common for apartments, offices, and commercial buildings.
- Heritage Structures: Lime plaster and lime pointing are used to preserve the original texture and breathability of old walls.
- Rural Buildings: Mud plaster and simple pointing methods are economical and eco-friendly options.
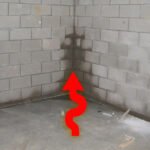
Because of India’s monsoon climate, both plastering and pointing play a key role in preventing dampness, water seepage, and wall damage.
Advantages and Disadvantages
| Aspect | Plastering | Pointing |
|---|---|---|
| Advantages | Smooth surface, weatherproof, ready for painting | Highlights masonry pattern, economical, easy to repair |
| Disadvantages | More expensive, can crack if poorly cured | Less durable, needs regular maintenance |
| Best For | Modern structures | Exposed brick or stone masonry |
Summary of Comparison
| Criteria | Plastering | Pointing |
|---|---|---|
| Coverage | Entire wall surface | Only joints |
| Finish | Smooth and even | Visible joint patterns |
| Water Resistance | High | Moderate |
| Durability | Long-lasting | Requires frequent repair |
| Cost | Higher | Lower |
| Preferred For | Interiors and exteriors | Decorative masonry and facades |
Expert Tips
- Always clean and dampen the wall before applying plaster or pointing.
- Use good quality sand and cement to prevent cracks and weak bonding.
- Ensure proper curing for at least 7 days.
- Avoid plastering or pointing during heavy rain or very hot weather.
- For heritage or exposed brick structures, lime mortar gives better results than cement.
FAQs on Plastering and Pointing
1. What is the main difference between plastering and pointing?
Plastering covers the entire wall or ceiling, while pointing is applied only to the joints of brick or stone masonry.
2. Which is more durable: plastering or pointing?
Plastering is more durable because it provides full wall coverage and better water protection.
3. Can plastering be done on a wall that already has pointing?
Yes, but the pointing pattern will be hidden under the plaster layer.
4. Which is more economical?
Pointing is more economical because it covers only the joints and requires less material.
5. What type of plaster is best for interiors?
Gypsum plaster is preferred for interiors due to its smooth finish and quick setting.
6. Why is pointing necessary for stone masonry?
Pointing helps protect stone joints from water and enhances the natural appearance of the masonry.
7. How long does plaster last?
Good quality plaster, if maintained properly, can last 15–20 years.
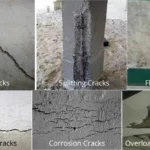
8. What causes plaster cracks?
Cracks may appear due to poor workmanship, improper curing, or rapid drying.
Conclusion
Both plastering and pointing are important finishing works in building construction.
Plastering provides a smooth, strong, and weatherproof surface suitable for modern structures. Pointing, on the other hand, protects joints and enhances the beauty of exposed brick or stonework.
The choice between plastering and pointing depends on the aesthetic preference, cost, material used, and type of structure.
In India, cement plastering is more common in residential and commercial buildings, while lime pointing remains popular for traditional and heritage structures.
With proper materials, skilled workmanship, and adequate curing, both techniques ensure that your structure is strong, long-lasting, and visually appealing.