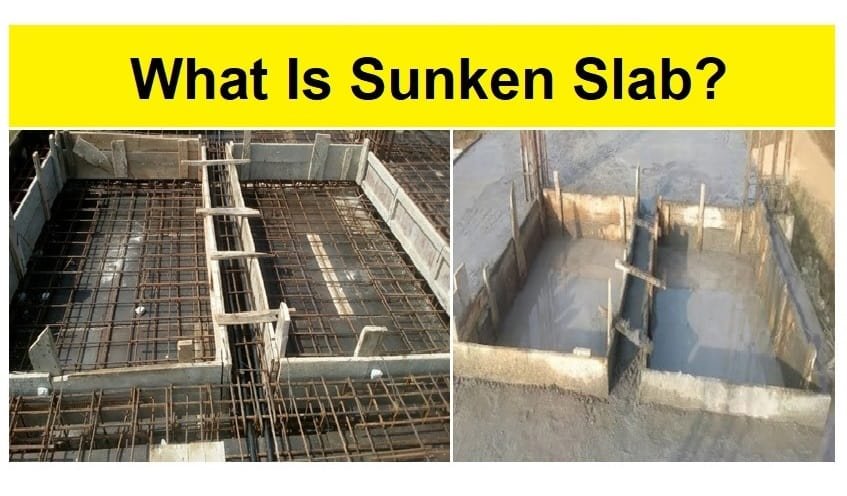
A sunken slab (also spelled sunk slab or sunken floor) is a portion of structural floor that is intentionally cast at a lower level than the surrounding finished floor. In simple words, the slab surface in that area sits a step down from the rest of the room. Builders use sunken slabs where plumbing, drainage or ducts must be concealed, or where a lowered platform is required for functional or aesthetic reasons. You will see sunken slabs most often in bathrooms, wet areas, laundries, service pits, and sometimes in modern “sunken living room” interiors. This article explains what a sunken slab is in full detail. It covers types, purposes, design and construction steps, waterproofing, pros and cons, costs, alternatives, Indian standards and practical checklists. The language is plain. Sentences are short. This is written for students, site supervisors and homeowners in India.
Quick summary: when and why we use a sunken slab
Sunken slabs are provided when pipes, drainage and service ducts cannot be routed above the finished floor. Lowering the slab gives space to lay pipes, traps and floor drains without raising the main floor level. Sunken slabs also help in positive drainage, when the floor needs a fall toward a drain in a compact area. In homes, sunken slabs are common in bathrooms and wash areas. In industrial or service buildings they are used for pits and trench covers. Beyond function, sunken living rooms and terraces are used as a design feature to define space. Several practical guides and building articles note these common uses. theconstructor.org+1
Basic definition and anatomy
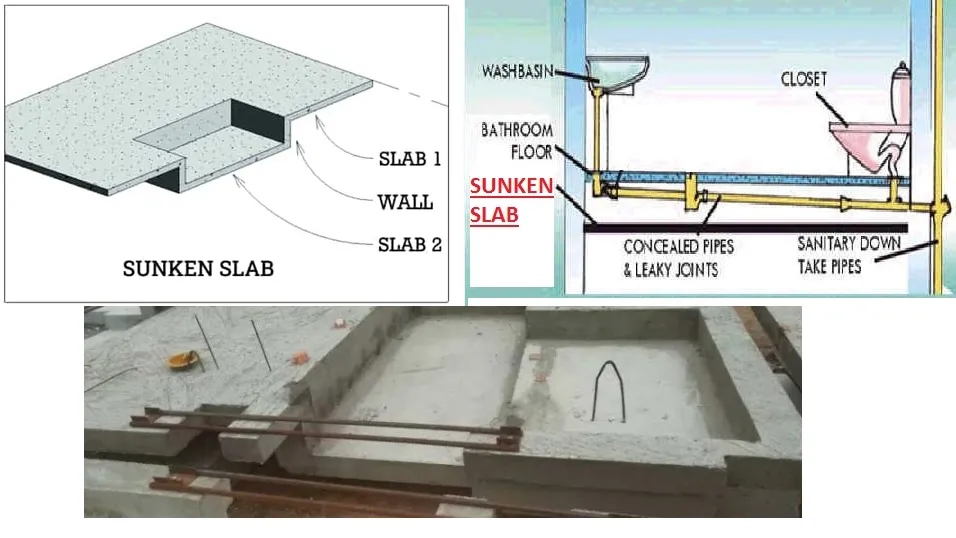
A sunken slab is simply a horizontal reinforced concrete slab that is lower than the adjoining floor slab. It consists of:
- Bottom slab plane at the lower level.
- Edges and upstands that join the sunken slab to the surrounding floor.
- Waterproofing layer over or under the slab (very important).
- Protective screed or tile bedding on top for finishes.
- Floor drain and trap at the low point to remove water.
The typical depth of a sunken slab (the vertical difference from normal floor to sunk slab floor) ranges from about 75 mm to 300 mm or more, depending on pipe sizes and access requirements. Common practice for a house bathroom is around 100–250 mm of sink depth to accommodate plumbing and allow a good slope to drain. Practical guides for builders in India recommend depths around 200–300 mm for pipe runs and access. UltraTech Cement+1
Also Read What is Footing in Construction? — Complete Guide for Indian Builders and Engineers
Types of sunken slabs (by use and form)
Sunken slabs can be classified in simple ways:
- Service sunken slab (wet areas): For bathrooms, toilets, laundry and areas needing drainage. Pipes run under the sunken slab and the floor slopes to a drain. theconstructor.org
- Pit or inspection sunken slab: Used as inspection pits in vehicle workshops or plant rooms for service access. These are deeper and may require more structural design.
- Sunken living floor (architectural): A deliberate lowered seating or conversation area (sunken living room). These are done for aesthetics and may be shallow. decoist
- Sunken terrace or planter slab: For balconies or landscape elements where level change is used for planting or water features.
Each type needs its own detailing for slopes, waterproofing and finishing.
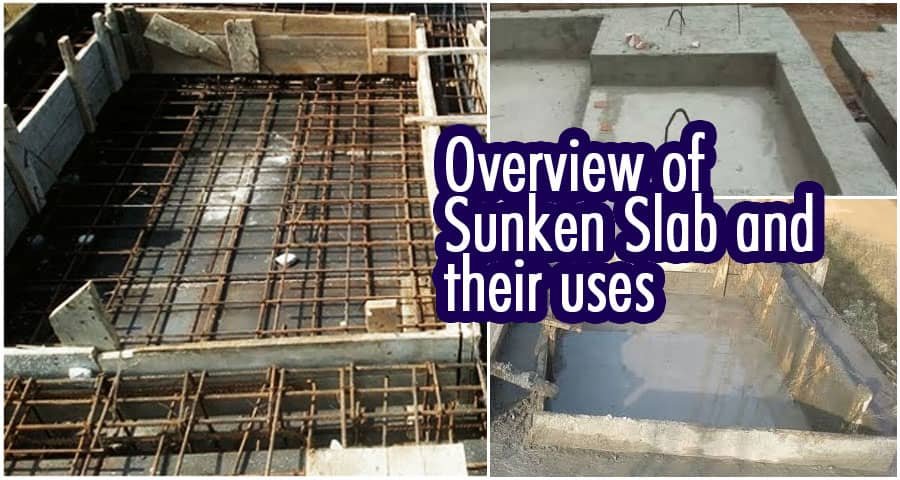
Main purposes and benefits
Sunken slabs are chosen for specific functional and aesthetic reasons:
- Conceal services: They hide plumbing lines, traps and ducts below the finished floor. This keeps the room neat. Housing
- Positive drainage: A lower area allows the designer to slope the floor to one or more drains so water does not pond. This is important in toilets and shower areas. theconstructor.org
- Maintain uniform finished floor height: Instead of raising the whole floor to hide pipes, the sunk area keeps the rest of the floor level uniform. Brick & Bolt
- Aesthetic and spatial definition: Sunken living areas create visual interest and define functional zones without partitions. decoist
- Service access: A well-detailed sunken slab can allow access to pipes through removable covers or inspection chambers without disturbing main finishes.
These benefits explain why sunken slabs remain popular despite the extra detailing and cost.
Key disadvantages and risks
Sunken slabs also carry important downsides. You must weigh them carefully:
- Waterproofing risk: Sunken areas are wetter by design. Any failure in waterproofing can cause leaks and dampness in the surrounding floor or lower slabs. This is the single biggest risk. Indian waterproofing guides emphasise special treatment for sunken areas. IriCEN+1
- More complicated construction: They need extra formwork, proper slopes, pipe coordination and inspections. This increases labour time. TheCivilStudies
- Higher cost: Extra concrete, formwork, waterproofing membranes and skilled labour raise cost versus a normal slab. TheCivilStudies
- Thermal and acoustic bridging: Lowered areas may need additional insulation in cold or noisy installations.
- Maintenance access: If laid without removable covers, pipes are harder to access without breaking tiles. Design for access is important.
Because of these reasons many builders prefer to use raised floors with additional false floors or tile screeds instead of sinking the structural slab, especially in retrofit situations.
Design considerations — what the engineer must check
Designing a sunken slab involves structural and service coordination. Important checks include:
- Depth and cover for pipes. Decide the depth to fully accommodate pipe diameters, traps and slope. Allow at least 50–75 mm minimum concrete cover over pipes if directly embedded, or provide dedicated ducting. Many field guides recommend sunk depths of 100–250 mm for bathrooms. theconstructor.org+1
- Drain location and slope. The sunken slab must have a fall to the drain. Typical falls are 1:100 to 1:50 (1%–2%) depending on finish. For tiled showers, a 1:100 (1%) to 1:80 slope is common; for slipperier surfaces the slope may need to be higher to avoid ponding.
- Waterproofing strategy. Decide whether to use integral waterproofing, membrane above structural slab, or membrane below with a protective screed. Indian codes and guidelines (e.g., IS 9918, IS 13182) and institutional guides suggest careful detailing of joint areas and floor-to-wall junctions for wet areas. Law Resource+1
- Reinforcement and structural loads. Sunken slabs remain structural slabs. They need adequate RC reinforcement for bending, temperature and shrinkage. Where pits or stepped levels are deep, design for 3D bending and support loads from users, furniture or vehicles (in pit cases).
- Edge detailing. Proper upstand and chase details at the junction of sunk and normal slabs prevent leakage and cracking. Upstands should be continuous and connect to waterproof layers.
- Inspection and maintenance access. Make access panels or removable covers for service points and traps so repairs do not damage tiles.
- Thermal and acoustic insulation. If below slab is conditioned space, consider insulation and acoustic membranes.
- Finish selection. Non-slip tiles or screed finishes that maintain slope and durability are essential for wet areas.
These considerations should be in the method statement and drawings before execution.
Indian codes and waterproofing guidance
Sunken slabs are wet-area elements. Indian standards and technical guidance that help are:
- IS 9918 (1981) — Code of practice for in-situ waterproofing (execution guidelines for some systems). It gives execution practices for bituminous and other coatings. Law Resource
- IS 13182 (1991) — Guidelines related to waterproofing and damp-proofing of wet areas (practical considerations). CracIndia
- IS 1742 (1983) — Code of practice for building drainage — for drain sizing and fall details. Law Resource
- IRICEN / institutional waterproofing guides — Railways and infrastructure agencies provide practical notes often adopted on sites (for example, IRICEN waterproofing guidelines). These recommend polymer cementitious coatings or epoxies for sunken slabs. IriCEN
Use these standards to define detailing, slope, thickness and testing requirements. Local municipal regulations may also specify additional rules for wet areas and drains.
Typical materials and waterproofing systems
A sunken slab requires multiple layers. Typical build-up from bottom to top is:
- Prepared base / compacted subgrade or PCC blinding (50–100 mm). This gives a clean, level surface to lay the sunken slab.
- Structural RC sunken slab (grade as per design). Reinforcement as specified.
- Primer / levelling layer if needed.
- Waterproofing layer. Options include:
- Cementitious polymer waterproofing (brush-applied or slurry). Common in India for internal wet areas.
- Liquid-applied PU (polyurethane) membranes — flexible and durable for wet areas.
- EPDM or PVC membranes (sheet) — must be protected by screed.
- Bituminous membranes — used historically; need protection and good joints.
- Integral crystalline waterproofing admixtures in the concrete — may be used as added protection but are rarely the only system in wet areas. Asian Paints+1
- Protective screed (typically 25–50 mm) or tile bedding mortar. This protects membrane from damage during tiling and use.
- Tiling / finish with non-slip tiles and proper grout.
For drains and pipe penetrations use factory-made flange drains with clamping flanges to ensure watertight penetration. Seal with recommended sealants and consider inspection chambers below critical drains.
Step-by-step construction method (practical)
Below is a practical sequence used on many Indian worksites. Adapt it to the design drawings and project specifications.
- Marking and excavation: Mark the sunken area and remove soil to design depth. Protect adjacent floor levels and finishes.
- PCC blinding: Lay 50–100 mm of PCC 1:4:8 to provide a clean base. Cure briefly.
- Set up formwork and reinforcement: Install formwork for the sunken perimeter and place reinforcement mesh and bars as per the structural drawing.
- Place structural sunken slab concrete: Pour and compact. Maintain designed slump for adequate compaction. Finish top to level for the subsequent waterproofing.
- Curing of structural slab: Cure for minimum 7 days or as specified. Good curing reduces cracking and improves waterproofing adhesion.
- Priming and leveling: If the surface is uneven, apply a cementitious leveling screed. Prime the cleaned surface as per waterproofing manufacturer instructions.
- Apply waterproofing system: Install the chosen membrane or coating according to manufacturer instructions. Ensure upstands and junctions with walls are done. Provide adequate overlaps, clamping and protection.
- Test the waterproofing (flood test): A standard practice is to fill the sunken area with water to a depth (e.g., 25–50 mm) for 24–72 hours and observe for seepage. Indian guides recommend a ponding test before tiling. Asian Paints+1
- Protective screed and tiling: Apply protective screed and then lay tiles with suitable adhesive. Maintain slopes to drain.
- Grouting and sealant joints: Use epoxy or polymer grout for critical areas. Seal edges and junctions with suitable sealants.
- Final inspection and handover: Check slopes, drainage, joing seals and finishes. Provide maintenance instructions.
Document each step with photos and test records. This documentation is useful if leakage occurs later.
Flood test: how and why
A flood test (ponding test) checks waterproofing integrity. The method broadly used in India is:
- Plug the drain and fill the sunken area with water up to a 25–50 mm level.
- Keep the water for 24 to 72 hours as per the waterproofing specification.
- Look for seepage on the underside or adjacent rooms. Also monitor for a sudden drop in water level (indicates leaks).
- After the test, drain and dry the area, repair any defects, and retest if needed.
Many contractors and codes demand a successful flood test before final finishing to avoid covering defects under tiles.
Practical table — recommended slopes and depths
| Area type | Typical sunk depth (mm) | Recommended slope to drain |
|---|---|---|
| Shower / wet area | 100–150 | 1:100 to 1:80 (1.0%–1.25%) |
| Bathroom (complete) | 150–250 | 1:100 to 1:80 |
| Utility / laundry | 150–200 | 1:100 |
| Vehicle pit | 400–1000+ | 1:200–1:100 depending on drainage |
| Sunken living room (aesthetic) | 50–200 | Minor slope to avoid ponding |
These are practical ranges. Final dimensions must follow project drawings and local practice.
Cost implications and comparison with alternatives
Sunken slabs cost more than a normal slab. Extra cost comes from:
- Additional excavation and removal.
- Formwork for sunk edges.
- Waterproofing membrane and protective screed.
- Skilled labour for detailing and inspection.
- Time for flood testing and repairs if needed.
Alternatives that reduce cost include:
- Raised floor with tile-over-mortar fall: Build up the surrounding floor slightly and create a tiled fall to the drain. This avoids cutting structural slab but increases finished floor height. TheCivilStudies
- Concealed false floor (riser channels): Use channels or boxed ducts above slab to hide pipes. This is common in retrofit works.
- Precast inspection chambers and access panels: Avoid sinking the entire slab but provide local pockets for inspection.
Choose the option based on usability, accessibility, aesthetics and budget.
Common field mistakes and how to avoid them
- Skipping waterproofing details at junctions. The most common cause of leaks is poor detailing at wall-to-floor junctions, door thresholds and pipe penetrations. Use proper corners, upstands and sealants. Asian Paints
- Inadequate slope. If slope is too flat, water may pond and grout will stain. Maintain consistent falls to drain.
- Using wrong membrane or poor adhesion. Follow manufacturer instructions for primers, curing time, and protection.
- No flood test before tiling. Once tiles are fixed, repairs are costly. Always do a ponding test.
- Poor coordination with plumbers. Pipes must be placed and tested (pressure test) before waterproofing. Coordinate early in the schedule.
- Insufficient cover or reinforcement detailing. Cracks in the slab undermine waterproofing. Reinforce as per structural design and control joints where needed.
Avoid these by planning, scheduling tests and using experienced waterproofing applicators.
Maintenance tips
- Inspect grout and sealant joints every year. Re-seal where necessary.
- Keep drains clean and free of hair and debris. Blocked drains cause ponding and staining.
- Avoid harsh chemicals that can damage some membranes. Use recommended cleaners.
- After any plumbing work, re-test the area for leaks before re-tiling.
- If you detect seepage, investigate immediately—early repair is cheaper than full de-tile and re-waterproof.
Good maintenance extends the life of the sunken slab and prevents damage to the substructure.
Table — quick pros & cons at a glance
| Pros | Cons |
|---|---|
| Conceals services and keeps floor levels uniform. | Higher construction cost and more work. |
| Enables reliable slope to drain in compact areas. | Waterproofing failure risk; requires careful detailing. |
| Creates design features (sunken living areas). | Harder to access buried pipes unless inspections provided. |
| Better aesthetics in wet areas compared to raised floor finishes. | Extra time for testing and curing; may delay finishes. |
FAQs — Practical questions Indian users ask
Q1. How deep should a sunken slab be in a typical bathroom?
A1. For most bathrooms a sunken depth of 100–250 mm is common. This allows room for traps, pipe bedding and needed falls. The exact depth depends on pipe diameters and the finish design. theconstructor.org+1
Q2. Where should waterproofing be applied — above or below the slab?
A2. Best practice is to apply a durable waterproof membrane above the structural slab and under the protective screed. This enables easy repair by removing the screed and re-coating. Integral admixtures help but are not substitutes for membranes in wet areas. IS and agency guides recommend membranes for sunken wet areas. Law Resource+1
Q3. Can I avoid a sunken slab and use tile slopes instead?
A3. Yes. In many cases you can use tile mortar to create falls over a normal slab. This reduces structural work and waterproofing complexity. However, if you must hide large pipes or have inspection requirements, a sunken slab may still be the best solution. TheCivilStudies
Q4. What is the flood test procedure and why is it necessary?
A4. The flood test (ponding test) fills the sunken area with water for 24–72 hours to check for leaks. It is necessary because waterproofing defects are easiest to find before tiling. Many Indian specifications require and accept the flood test as proof of leak-tightness. Asian Paints+1
Q5. Which waterproofing system is most recommended?
A5. Cementitious polymer coatings and PU liquid membranes are widely used for internal sunken slabs in India. Sheet membranes (PVC/EPDM) are also effective but need careful protection. The choice depends on access, durability needs and budget. Use systems with good local references and follow manufacturer application instructions. Asian Paints+1
Conclusion — practical advice before you commit to a sunken slab
A sunken slab is a useful construction detail when you need concealed services or reliable drainage in a compact area. It can also create attractive interior features. However, sunken slabs demand careful planning, proper waterproofing and good coordination between structural, plumbing and finishing teams. In India, follow the practical guidance in IS standards and agency manuals, choose a proven waterproofing system, and always perform a flood test before finishing.
If you are an engineer or site supervisor, produce clear drawings for depth, slope and drain locations. If you are a homeowner, ask to see the waterproofing product data sheet and the flood test result before accepting the work. With good design and execution, a sunken slab will serve its purpose for decades without problems. With poor detailing it becomes a long-term headache. Plan, inspect and test — that is the practical recipe for success.